Hurricane Season 2026: How to Prevent and Handle Mold After a Storm
Out of the Mold Editorial Team
Our guides are research-backed and cite EPA, CDC, and peer-reviewed sources. Product reviews are based on hands-on testing, not manufacturer claims. Read our editorial standards.
Affiliate Disclosure: Out of the Mold is reader-supported. As an Amazon Associate, we may earn a commission when you buy through links on this page — at no extra cost to you. Our picks are based on independent standards, manufacturer specifications, and published research, not commissions.
Key Takeaways
- Mold grows within 24–48 hours of flooding — acting fast in that window prevents $15,000+ remediation bills.
- NOAA's Aug 2026 update forecasts a below-normal season: 7–13 named storms, 2–6 hurricanes, 0–2 majors (75% chance below-normal, El Niño suppressing activity). A quiet season still only needs one storm at your address.
- FEMA says cut drywall 12 inches above the water line. Below 2.5 ft of flooding: remove to 4 ft. Above 2.5 ft: remove to 8 ft.
- NFIP flood insurance does NOT cover mold — the biggest coverage gap most homeowners don't realize until filing a claim.
- Buy dehumidifiers, moisture meters, and PPE before the season. Prices spike 30–50% after storms and inventory sells out.
Mold starts growing within 24–48 hours after flooding — acting fast in that window is the single most important factor in preventing a $15,000+ remediation bill. NOAA now forecasts a below-normal 2026 Atlantic season: 7–13 named storms, 2–6 hurricanes, and 0–2 majors, with a 75% chance of below-normal activity as El Niño suppresses storm formation (NOAA, Aug 6 2026). This guide covers pre-storm prep, the critical post-flood drying timeline, insurance claims, and when to call a professional. A quiet season still only needs one storm at your address — Tropical Storm Arthur already dropped record rainfall on Louisiana this June.
Here's the fact that should shape every decision after a storm: per the EPA's guidance, wet materials that aren't dried within 24–48 hours should be assumed to be growing mold. The window is that tight — which is why the prep you do before a storm matters more than anything you buy after one.
It's worth being precise about the 2026 outlook, because the early pre-season forecasts (11–16 storms) have been revised sharply down. In its August 6, 2026 update, NOAA forecast 7–13 named storms, 2–6 hurricanes, and 0–2 major hurricanes, with a 75% chance of a below-normal season. El Niño emerged in the Pacific in June and became the dominant factor, raising the wind shear that tears storms apart. Through mid-September, only two named storms — Arthur and Bertha — had formed, with no hurricanes yet. But we're now inside the September–October climate peak, and Arthur's record Louisiana rainfall is the reminder: a below-normal season is a statistic, not a shield. If your home takes water, the clock starts immediately regardless of the seasonal total.
If you're reading this after a storm has already hit, skip to the 48-hour response section. If you still have time to prepare, start with the preparation checklist — and note that the gear below sells out and jumps 30–50% in price the week after landfall, so buying ahead is the cheapest insurance there is.
Before the Storm: Mold Prevention Checklist
Everything on this list is cheaper and easier than dealing with mold after the fact. Most of it you can do in a weekend.
Waterproofing and Drainage
- Test your sump pump— Pour a bucket of water in the pit. If it doesn't kick on immediately, fix or replace it before hurricane season. A battery backup ($150–$300) keeps it running during power outages.
- Clear gutters and downspouts — Clogged gutters dump water against your foundation. Extend downspouts at least 6 feet from the house.
- Check foundation drainage — The ground should slope away from your house at a minimum of 6 inches over the first 10 feet. Flat or inward-sloping grade is a flood invitation.
- Seal basement cracks — Hydraulic cement or polyurethane injection seals foundation cracks from the inside. Cost: $20–$100 DIY, $500+ for a professional.
Emergency Supplies to Buy Now
- Dehumidifier — A 50-pint model handles most rooms; for a basement or crawl space, step up to a low-temperature unit. Buy before the season — prices spike 30–50% after storms and inventory sells out within days.
- Moisture meter — Around $20–$40 for a pinless model. Essential for monitoring drying progress. Your target: below 15% in wood, below 50% relative humidity in air.
- HEPA air purifier — A true-HEPA unit captures the spores that go airborne while you tear out wet materials, protecting the rooms you've already dried.
- PPE kit — N95 or P100 respirators, nitrile gloves, and non-vented goggles before entering any flood-damaged space. See our protective gear guide for the right tier by job size.
- Shop vacuum (wet/dry) — For extracting standing water. Rent a commercial extractor ($40–$80/day) if flooding is severe.
- Industrial fans — At least 2 high-velocity fans for drying. Available at home improvement stores or rental shops.
- Antimicrobial spray — Concrobium Mold Control treats surfaces and prevents mold from colonizing during the critical 48-hour window. For exposed framing over a wide area, a foggercovers what a spray bottle can't reach.
The four pieces that actually decide the outcome — pull moisture out, capture airborne spores, treat exposed framing, and protect yourself:
hOmeLabs 50-Pint Energy Star Dehumidifier
hOmeLabs
$220–260
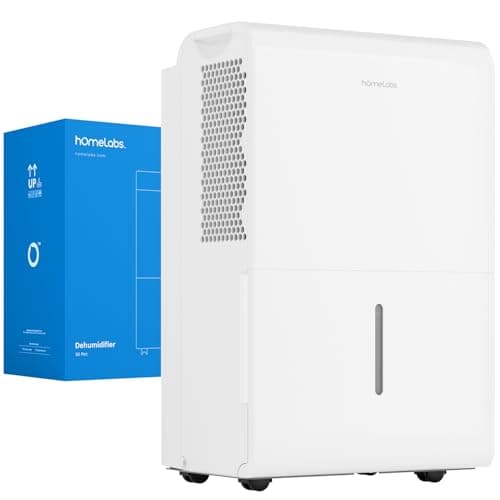
The best-selling 50-pint dehumidifier on Amazon and our top overall pick for mold prevention. Set your target humidity (aim for 45-50%) and the built-in humidistat cycles the compressor to hold it. A rear hose port allows continuous gravity draining into a floor drain, and turbo mode speeds up moisture removal after water events. Energy Star certified to keep 24/7 running costs reasonable.
Pros
- 50-pint capacity handles basements and large rooms up to 4,500 sq ft
- Built-in humidistat holds your target humidity automatically
- Continuous-drain hose port for set-and-forget operation
Cons
- No built-in pump — gravity drain or bucket emptying only
- 1.6-gallon bucket fills every 6-8 hours in very damp spaces
- Fan is audible on turbo mode
Coway Airmega AP-1512HH True HEPA Air Purifier
Coway
$200–260
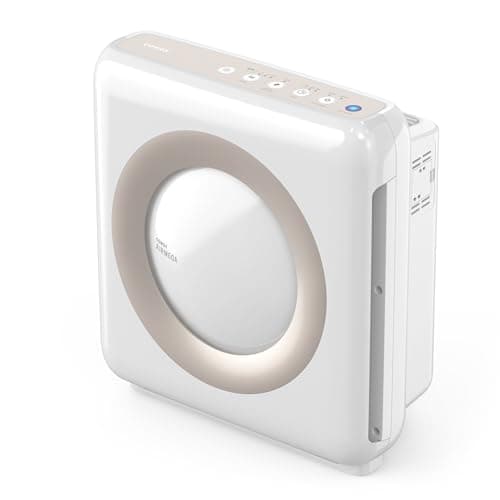
The long-standing benchmark for HEPA air purifiers. A four-stage system — pre-filter, deodorizing activated-carbon filter, True HEPA, and an optional ionizer — pulls mold spores, pollen, and musty odor out of rooms up to 1,748 sq ft. The pollution sensor ramps the fan when spore counts spike (say, right after you disturb growth during cleanup), then idles down in Eco mode. Independent testing sites have ranked it a top performer for years.
Pros
- True HEPA captures 99.97% of particles down to 0.3 microns — well below mold spore size
- Dedicated activated-carbon layer handles the musty VOCs HEPA can't
- Covers up to 1,748 sq ft; air-quality sensor auto-adjusts fan speed
Cons
- Ionizer mode is on by default — turn it off (produces trace ozone, no mold benefit)
- Replacement filter sets run ~$40–60 a year
- No app control on the base model
Concrobium Mold Control Fogger
Concrobium
$40–100
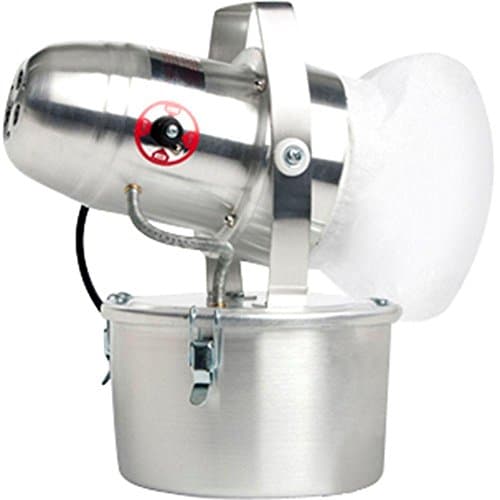
A complete fogging system that disperses Concrobium Mold Control as a fine mist to treat entire rooms. The cold-fog technology reaches into cracks, crevices, and HVAC ducts where mold hides. Kills existing mold and leaves a protective barrier to prevent regrowth.
Pros
- Treats entire rooms including hard-to-reach areas
- Non-toxic Concrobium formula, safe for occupied spaces
- Includes cold fogger machine and mold control solution
Cons
- Fogger machine is loud and requires setup
- Does not remove existing mold stains
- Solution needs time to dry and form protective barrier
Klein Tools ET140 Pinless Moisture Meter
Klein Tools
$45–60
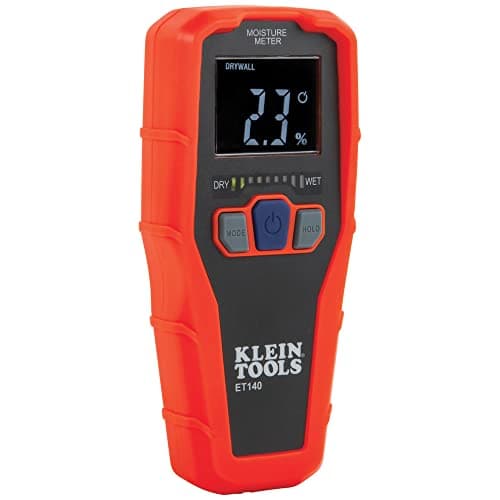
A professional-grade pinless moisture meter that detects hidden moisture in drywall, wood, and masonry without leaving holes. Uses electromagnetic sensor technology to measure moisture content up to 3/4 inch below the surface. Essential for identifying moisture problems before mold develops.
Pros
- Non-invasive pinless technology, no holes in walls
- Detects moisture up to 3/4 inch deep
- Visual and audible moisture alerts
Cons
- Less precise than pin-type meters on exact moisture percentage
- Battery not included
- Can give false readings on metallic or foil-backed surfaces
Documentation for Insurance
- Photo and video your entire home — Every room, every valuable, every finish. Store copies in the cloud, not just on your phone.
- Know your coverage — Standard homeowner insurance typically caps mold coverage at $1,000–$10,000 per claim. National Flood Insurance Program (NFIP) policies do not cover mold damage at all — a critical gap most homeowners don't realize until filing a claim.
- Review your deductible — Some policies have separate wind/hail deductibles (1–5% of home value) in hurricane zones.
3M 8511 N95 Particulate Respirator
3M
$20–30
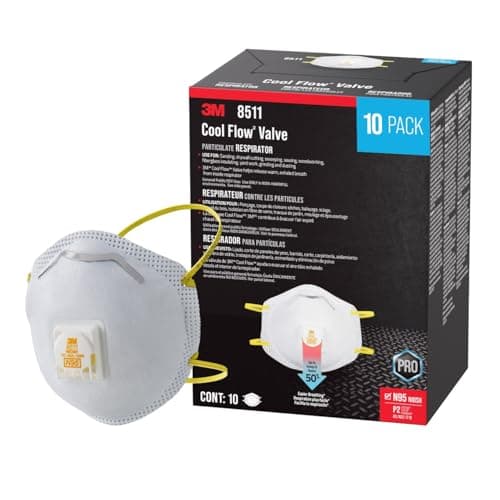
A NIOSH-approved N95 particulate respirator with Cool Flow exhalation valve for comfortable breathing during mold remediation. Filters at least 95% of airborne particles including mold spores. The adjustable M-noseclip and dual-strap design provide a secure seal. OSHA-recommended for mold work.
Pros
- NIOSH-approved N95 filtration
- Cool Flow valve reduces heat buildup
- Adjustable nose clip for secure fit
Cons
- Disposable, not reusable long-term
- Does not protect against chemical fumes or VOCs
- May not fit all face shapes comfortably
During the Storm: Limiting Moisture Damage
You can't stop a hurricane, but you can reduce how much moisture gets inside.
- Keep all doors and windows sealed— Don't open them to "equalize pressure." That's a myth that just lets water in.
- If power goes out, the mold clock starts — Without air conditioning or dehumidification, indoor humidity in Gulf Coast states can hit 80–90% within hours. A portable generator ($500–$1,200) running a dehumidifier and a fan is the single most valuable post-storm investment.
- Move valuables above potential flood level — First floor furniture, documents, and electronics should be elevated or moved upstairs when evacuation orders come.
- Turn off HVAC — If water enters the home, a running HVAC system spreads contaminated moisture through every duct.
After the Storm: The Critical 48-Hour Timeline
This is where everything matters. The speed and sequence of your response determines whether you're cleaning mold off surfaces or tearing your house down to the studs.
Hours 0–24: Assess and Extract
- Safety first— Don't enter until floodwaters have fully receded. Check for structural damage, downed power lines, and gas leaks before going inside. Wear PPE: N95 respirator, goggles, rubber boots, gloves.
- Document everything — Before touching anything, photograph and video all damage for your insurance claim. Take wide shots and close-ups. Note the water line on walls.
- Remove standing water — Use a pump, shop vac, or buckets. Every hour of standing water increases mold risk exponentially.
- Open the house— Once it's safe, open all windows and doors. Get air moving with fans. Start the dehumidifier immediately.
Hours 24–48: The Critical Drying Window
- Mold colonization begins now — At 24 hours, mold spores that were dormant on every surface in your home start germinating in the wet conditions. By 48 hours, visible growth can appear.
- Remove saturated materials— Carpet, carpet padding, and any insulation that got wet. These can't be dried fast enough to prevent mold. See our mold in carpet guide for save-or-replace decisions.
- Cut drywall above the water line — FEMA recommends cutting drywall 12 inches above the visible water line because floodwater wicks upward by capillary action. For water levels above 2.5 feet, remove wall material to 8 feet or the ceiling junction.
- Spray exposed framing — Once drywall is removed, treat exposed studs and sill plates with Concrobium or a similar antimicrobial to prevent colonization while drying.
Days 2–7: Active Drying
- Run dehumidifiers and fans 24/7 — Target: below 50% relative humidity and below 15% moisture content in wood framing. This typically takes 3–5 days with proper equipment.
- Monitor with a moisture meter daily— Don't guess when things are dry. Take readings on studs, subfloor, and remaining drywall. Record the numbers for your insurance documentation.
- Remove any materials showing mold — If you see fuzzy growth, discoloration, or smell must on any remaining materials, remove them immediately.
Week 2+: Watch for Hidden Mold
Even after the visible drying is done, mold can develop in hidden areas: behind remaining drywall, under subfloors, inside wall cavities, and in HVAC ductwork. If you notice a musty smell developing in the weeks after a flood — even in areas you've already cleaned — it means mold has colonized somewhere you didn't reach. See our guide to identifying mold by smell for help tracking it down. Our mold removal guide covers the products and methods for each surface type.
Concrobium Mold Control
Concrobium
$10–15
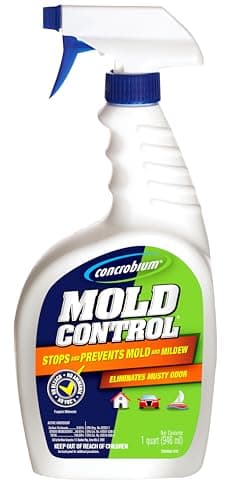
A patented, EPA-registered mold control solution that kills mold without bleach, ammonia, or VOCs. The tri-salt polymer formula crushes mold spores as it dries and leaves an invisible antimicrobial barrier to prevent regrowth. Safe for indoor use on virtually any surface.
Pros
- Non-toxic, no bleach or ammonia
- Kills mold and prevents regrowth
- Safe for use around children and pets
Cons
- Does not remove existing mold stains
- Takes longer to work than bleach-based products
- May require multiple applications for severe infestations
DIY vs. Professional Mold Remediation After a Storm
The decision depends on scale, water source, and your comfort level.
| Factor | DIY Appropriate | Call a Professional |
|---|---|---|
| Area affected | Under 10 sq ft | Over 10 sq ft |
| Water source | Clean rainwater | Sewage, storm surge, contaminated flood |
| Location | Surfaces, accessible areas | Behind walls, subfloor, HVAC system |
| Structural damage | None | Sagging drywall, soft framing, compromised subfloor |
| Health symptoms | None present | Respiratory issues in household members |
Remediation Costs in 2026
Professional mold remediation after flooding averages $1,200–$3,750 for a contained area. Severe whole-home post-flood jobs run $10,000–$30,000+. Costs spike 20–40% in the weeks after a major hurricane due to overwhelming demand — another reason to prepare now and act fast.
Red flags when hiring: Be wary of door-to-door solicitation after storms — remediation scams increase dramatically. Always verify IICRC certification, get at least three written quotes, and never pay in full upfront. A legitimate company will conduct a moisture assessment before quoting.
Insurance Claims for Mold After Hurricane Damage
Insurance coverage for post-hurricane mold is complicated, and the rules catch a lot of homeowners off guard.
What's Typically Covered
- Homeowner's insurance— Covers mold if it results from a "sudden and accidental" covered peril. Hurricane wind damage causing a roof leak that leads to mold? Covered. Rising floodwater? Not covered by homeowner's insurance.
- Flood insurance (NFIP) — Critically, NFIP policies do not cover mold damage. FEMA explicitly excludes mold from flood insurance payouts. This is the biggest coverage gap for hurricane-zone homeowners.
- Mold sub-limits — Even when coverage applies, most policies cap mold remediation at $1,000–$10,000. Given that average remediation costs $1,200–$3,750 (and severe cases hit $30,000), the gap is enormous.
How to File Successfully
- Document immediately and thoroughly — Photos, video, written timeline. Date-stamp everything. Your insurer will look for evidence that you mitigated promptly.
- Mitigate first, claim second — Insurers can deny claims if you failed to take reasonable steps to prevent further damage. Start drying and removing wet materials immediately, then file the claim.
- Get a professional mold inspection — A formal inspection report from a certified inspector ($300–$600) strengthens your claim significantly.
- If your claim is denied — Request a written explanation, review your policy language carefully, and consider a public adjuster or attorney if the denial seems wrong. Mold claim denials are common and often overturned on appeal.
Post-Hurricane Mold by Location
Different areas of your home face different risks after flooding. Here's what to prioritize:
- Basement and crawl space — The most vulnerable area. Standing water, high humidity, and organic materials make basements ground zero for post-flood mold. Pump water, remove all stored items, and run dehumidifiers continuously.
- Drywall — Cut 12 inches above the water line per FEMA guidelines. Flood-damaged drywall cannot be dried fast enough to prevent mold in the paper backing.
- Carpet and padding — If submerged by floodwater, replace both. Contaminated water makes salvage unsafe per IICRC standards. The padding alone costs just $0.25–$3/sq ft — always replace it even if the carpet seems salvageable.
- Wood floors and subfloor — The subfloor is the hidden risk. Even if hardwood planks dry out, moisture trapped between the subfloor and the finished floor grows mold in the gap. Pull a few boards to check.
- HVAC system— Floodwater in the air handler contaminates the entire duct system. Don't run the HVAC until a professional inspects it. A contaminated system circulates mold spores to every room. See our AC mold guide.
The gear that does the work, matched to the room: our dehumidifier buyer's guide (with a crawl-space and basement breakdown), the best HEPA air purifiers for mold spores, and a fogger guidefor treating framing you've exposed. If the water reached wood, our removing mold from wood guide covers the save-or-replace call.
Frequently Asked Questions
How fast does mold grow after flooding?
Mold can begin growing on damp surfaces within 24–48 hours. Visible colonies typically appear within 3–7 days. By the two-week mark, mold can be well-established behind walls and under floors. The first 48 hours after water intrusion are critical.
Does homeowner insurance cover mold after a hurricane?
It depends on the water source. Wind-driven rain that enters through a damaged roof? Usually covered. Rising floodwater? Not covered by standard homeowner's insurance. NFIP flood insurance also excludes mold. Most policies cap mold coverage at $1,000–$10,000 even when it applies.
Can I stay in my house with mold after flooding?
The EPA recommends leaving if you see extensive mold (over 10 square feet) or if family members are experiencing respiratory symptoms. Children, elderly, and immunocompromised individuals should avoid flood-damaged homes until remediation is complete.
How much does mold remediation cost after a flood?
Contained areas: $1,200–$3,750. Full-home post-flood remediation: $10,000–$30,000+. Get at least three quotes from IICRC-certified companies. Costs increase 20–40% in the weeks immediately after a major hurricane due to demand.
Should I tear out drywall after flooding?
Yes. FEMA recommends removing drywall at least 12 inches above the visible water line because water wicks upward through the material. For water levels above 2.5 feet, remove to 8 feet or the ceiling. Flood-soaked drywall cannot be dried fast enough to prevent mold in the paper backing.
How do I know if my house has mold after water damage?
Watch for a musty smell developing 3–14 days after the water event, visible discoloration on walls or ceilings, peeling paint or bubbling wallpaper, and worsening allergy or respiratory symptoms. A mold test kit ($10–$45) confirms airborne spore levels — see our mold testing guide for which method to use — or hire a professional inspector ($300–$600) for a thorough assessment.
Frequently Asked Questions
How fast does mold grow after flooding?
Does homeowner insurance cover mold after a hurricane?
Can I stay in my house with mold after flooding?
How much does mold remediation cost after a flood?
Should I tear out drywall after flooding?
How do I know if my house has mold after water damage?
Related Articles
Best Dehumidifiers for Mold Prevention & Removal (2026)
Best Air Purifiers for Mold Spores & Musty Odors (2026)
Best Mold Fogger & Mold Bomb: Machines, Solutions & Safety Guide (2026)
How to Get Rid of Mold in Your Basement (2026 Guide)
Mold in Carpet: How to Tell If You Should Save It or Replace It
Concrobium Mold Control Review: What It Does (and What It Won't)
Dealing With Mold Right Now?
Our step-by-step mold removal guide walks you through testing your home, choosing the right products, and knowing when a job is too big for DIY.
Read the Removal Guide