Mold on Drywall: Should You Clean It or Replace It?
Out of the Mold Editorial Team
Our guides are research-backed and cite EPA, CDC, and peer-reviewed sources. Product reviews are based on hands-on testing, not manufacturer claims. Read our editorial standards.
Affiliate Disclosure: Out of the Mold is reader-supported. As an Amazon Associate, we may earn a commission when you buy through links on this page — at no extra cost to you. Our picks are based on real testing and independent standards, not commissions.
Key Takeaways
- Clean drywall only when the mold is on the painted surface and the board is still firm; replace it once mold reaches the paper facing or core.
- The depth test decides it: bubbling paint plus a soft or crumbling board means replace, not scrub.
- Skip bleach on drywall — it whitens the stain but leaves moisture and roots in the porous surface.
- Kill, dry, then seal with a mold-killing primer and finish with mold-resistant paint in damp rooms.
- Replace anything over ~10 sq ft or that keeps returning, and rebuild wet-area walls with cement board, not standard drywall.
Clean mold off drywall only when it's sitting on the painted surface. Replace the drywall when mold has soaked into the paper facing or the gypsum core, when the board is soft or crumbling, or when the moldy patch is bigger than about 10 square feet. Drywall's paper skin is basically mold food, so once growth gets past the paint there's nothing left to save — cutting it out is the fix, not scrubbing harder. Surface mold on a well-painted wall, though, usually wipes off, dries, and gets sealed with a mold-killing primer for good.
Finding a black or green bloom creeping up a wall is unsettling, and the first question is always the same: can I just clean this, or does the wall have to come out? That decision matters more than which spray you buy. Clean drywall that should have been replaced and the mold comes back through the paint within weeks. Rip out drywall that only had surface mold and you've spent a weekend and a few hundred dollars for nothing. The trick is reading how deep the mold actually went.
How mold gets on — and into — drywall
Standard drywall is a gypsum core sandwiched between two layers of paper. Gypsum itself doesn't feed mold, but that paper facing does, and so does the paint, the joint compound, and the dust that settles on it. Add moisture and you have every condition mold needs. The moisture shows up four common ways:
- Surface condensation. Cold exterior walls, poorly insulated corners, and unventilated bathrooms let humid air condense on the drywall face. This is the mildest case and usually the most salvageable.
- Leaks behind the wall.A dripping supply line, a failed shower pan, or a roof leak wets the drywall from the back, where you can't see it until it bleeds through. By the time a stain appears on the front, the paper backing is often already gone.
- Flooding or water damage. Drywall wicks water upward like a sponge — a few inches of standing water can leave a moisture line a foot or two up the wall. Saturated drywall almost never dries fast enough to beat mold.
- Chronic humidity. Basements, laundry rooms, and bathrooms that sit above 60% relative humidity grow mold slowly across whole wall sections without a single dramatic leak.
Whatever the source, the rule is the same: you fix the moisture first. A moisture-meter reading, or just finding and stopping the leak, has to come before any cleaning — or you're treating a symptom.
Signs of mold on (and behind) drywall
Visible mold is obvious. The harder call is spotting mold that's working behind the surface, because that's the mold that decides whether the wall stays or goes:
- Black, green, or white patches on the wall face
- Bubbling, peeling, or cracking paint — a classic tell that moisture (and often mold) is behind the paint film
- Drywall that feels soft, spongy, or warped when you press it
- A persistent musty smell strongest near one wall
- Brown or yellowish water stains, which mean the board got wet from behind at some point
If the smell is there but you can't see growth, the mold may be on the back of the drywall or inside the cavity. Our guide to what mold smells like covers how to trust your nose here, and the mold on walls guide covers the cases where you need to open the cavity to be sure.
Surface mold vs. mold inside the drywall: the depth test
This is the whole decision, and you can make it in about a minute. The question isn't how big the patch looks — it's how deep the mold went.
- Surface mold (cleanable).The growth sits on the paint or the paper skin. Press the wall — it's firm. The paint isn't bubbling. Scrape a hidden corner: the paper underneath is still white and intact. This drywall can be cleaned and sealed.
- Penetrated mold (replace).The paint bubbles or peels away with the mold. The board feels soft or crumbles under a fingernail. When you cut a small test slit, the paper backing is discolored or disintegrating and the gypsum behind it is stained. Porous drywall like this can't be decontaminated — the mold has rooted into material you can't scrub.
This matches federal guidance. The EPA is explicit that porous materials that stay wet and grow mold — drywall, ceiling tile, carpet — often have to be thrown away rather than cleaned, because mold grows into the tiny spaces they're made of. Hard, non-porous surfaces you can clean; saturated drywall you replace. If you're not sure the air or the cavity is clear after a bigger job, a mold test kit confirms whether spore counts have actually come down.
How to remove surface mold from drywall
For genuine surface mold on a firm, well-painted wall under about 10 square feet, this is a DIY job. Ventilate the room, wear an N95 and gloves, and don't use a pressure washer or a soaking-wet rag — adding water to drywall is how you turn a small problem into a replacement.
- Contain the dust. Close doors, open a window, and lay down a drop cloth. Disturbing mold releases spores.
- Kill it first, then wipe.Mist the area with a mold remover and let it dwell before wiping — don't dry-scrub, which just launches spores into the air. On painted, non-porous drywall, undiluted white vinegar (it kills roughly 82% of mold species) or a product like Concrobium both work. See does vinegar kill moldfor where vinegar wins and where it doesn't.
- Skip the bleach on drywall. Chlorine bleach is mostly water plus a whitener — it bleaches the stain pale but leaves the moisture (and roots) behind on a porous surface. Our does bleach kill moldguide explains why it's the wrong tool here.
- Dry it completely. Run a fan or a dehumidifier until the wall is bone dry. Any trapped moisture re-seeds the mold under your new paint.
- Prime with a mold-killing primer, then topcoat. This is the step that keeps it gone.
Concrobium Mold Control
Concrobium
$10–15
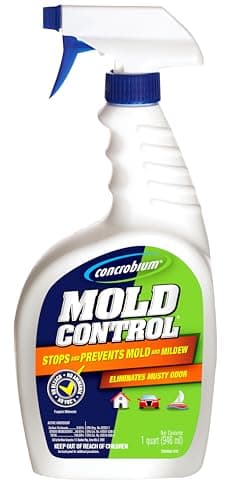
A patented, EPA-registered mold control solution that kills mold without bleach, ammonia, or VOCs. The tri-salt polymer formula crushes mold spores as it dries and leaves an invisible antimicrobial barrier to prevent regrowth. Safe for indoor use on virtually any surface.
Pros
- Non-toxic, no bleach or ammonia
- Kills mold and prevents regrowth
- Safe for use around children and pets
Cons
- Does not remove existing mold stains
- Takes longer to work than bleach-based products
- May require multiple applications for severe infestations
Seal it so it doesn't come back
Cleaning removes the mold you can see; sealing stops the next generation. After the wall is dry, a fungicidal primer bonds to the drywall and locks in any trace staining and odor so it doesn't ghost back through fresh paint. An EPA-registered mold-killing primer like Zinsser's does double duty — it kills lingering surface mold as it seals.
Zinsser Mold Killing Primer
Zinsser
$18–25
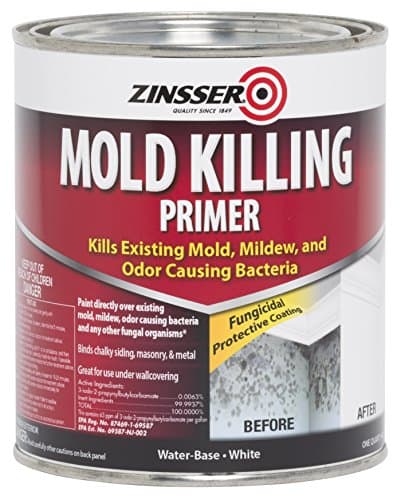
An EPA-registered fungicidal primer that kills existing mold, mildew, and odor-causing bacteria on contact. Creates a mold-resistant barrier on interior and exterior surfaces including drywall, wood, concrete, and masonry. Essential for mold remediation projects before applying topcoat paint.
Pros
- Kills existing mold on contact while priming
- EPA-registered fungicidal protective coating
- Bonds to all interior and exterior surfaces
Cons
- Strong odor during application, requires ventilation
- Water-based formula can raise grain on bare wood
- Must be topcoated with paint for lasting protection
In rooms that stay damp — bathrooms, basements, laundry — finish with a mold- and mildew-resistant topcoat instead of ordinary wall paint. It won't fix a moisture problem on its own, but on a wall you've already dried and sealed it buys years of protection. More on that in our mold-resistant paint guide.
Rust-Oleum Perma-White Mold & Mildew-Proof Interior Paint
Rust-Oleum
$25–35
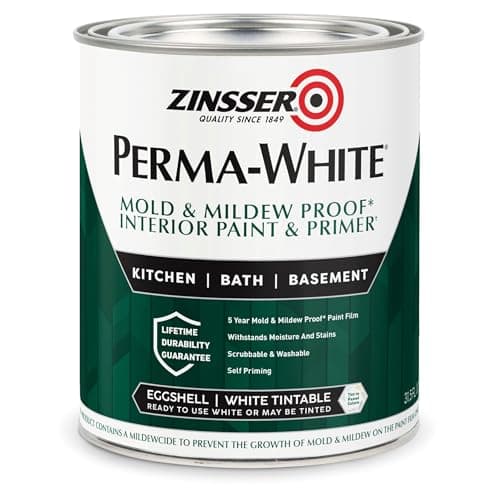
A self-priming, moisture-resistant interior paint with a 5-year mold and mildew-proof guarantee. The advanced acrylic formula resists moisture, dirt, and staining while providing a smooth satin finish. Ideal for high-humidity areas like bathrooms, basements, and kitchens.
Pros
- Self-priming formula saves time
- Guaranteed mold and mildew proof for 5 years
- Moisture-resistant, ideal for bathrooms and basements
Cons
- Limited to interior use only
- Available only in satin white finish
- Cannot be tinted to custom colors
When to replace moldy drywall
Cut it out — don't clean it — if any one of these is true:
- The paper facing or gypsum core is discolored, soft, or crumbling
- Paint bubbles or peels away with the mold
- The moldy area is larger than about 10 square feet (a 3 ft × 3 ft patch)
- Mold keeps returning through the paint after a proper clean-and-seal
- The drywall was flooded or soaked from a leak behind it
Replacing a section is straightforward: score and cut out the affected drywall well past the visible edge of the mold (a good rule is at least a foot into clean-looking board, because growth spreads under the surface), check and dry the cavity and framing behind it, treat the studs with a fungicidal primer, then patch in new board, tape, and mud. Bag the moldy cutoffs before carrying them out so you don't seed spores through the house.
The 10-square-foot line is where DIY ends and a pro makes sense. The EPA sets that same threshold for do-it-yourself cleanup. Beyond it — or anytime the mold is inside a wall cavity, tied to sewage or a big leak, or someone in the home has asthma — bring in a remediator.
What it costs to clean vs. replace
Cleaning is cheap; replacing is where the money goes — which is exactly why the depth test above pays off. Some current 2026 figures:
- Cleaning surface mold off a wall: about $2.34–$2.85 per square foot (Homewyse national average, September 2026) — or a few dollars for vinegar and a can of primer if you DIY it.
- Professional mold remediation: roughly $1,200–$3,750, averaging about $2,300 (This Old House, 2026), or about $10–$25 per square foot. Jobs that require removing and rebuilding wall sections sit at the higher end because you're paying for demolition, disposal, and rebuild on top of the cleanup.
To size your own job — including attic, basement, crawl space, and black mold scenarios — run the numbers on our mold removal cost calculator, which pulls its benchmarks from sourced contractor data.
Mold in bathroom walls
Bathrooms are the most common place drywall goes moldy, and they play by slightly different rules. If ordinary drywall was used behind a tiled shower or tub surround, water that gets past failing grout or caulk soaks the board from behind — and by the time you see it, replacement is usually the answer. For the tile-and-grout side of the problem, our how to remove mold from a shower guide covers grout and caulk directly.
When you rebuild a wet-area wall, don't reinstall standard drywall. Use a moisture-resistant board ("greenboard") for damp rooms, or cement board behind tile in a shower or tub surround — cement board has no paper facing and no organic material for mold to feed on. Pair that with a bathroom exhaust fan that actually vents outdoors and runs for 20–30 minutes after a shower, and the wall stops being a mold factory. This drywall page is part of our broader mold on walls guide, which links the material-specific fixes together.
How to prevent mold on drywall
- Keep indoor humidity between 30% and 50%. A hygrometer costs a few dollars; a dehumidifier handles chronically damp rooms.
- Fix leaks the day you find them. Most in-wall mold traces back to a slow leak that ran for weeks.
- Ventilate wet rooms. Exhaust fans in bathrooms and kitchens, vented outside — not into the attic.
- Use the right board in wet areas. Moisture-resistant drywall or cement board where water is a fact of life.
- Seal and topcoat after any repair. Mold-killing primer plus a mold-resistant paint in humid rooms.
Frequently Asked Questions
Can you paint over mold on drywall?
Is mold on drywall dangerous?
How do you know if mold is behind the drywall?
How much does it cost to replace moldy drywall?
Related Articles
Mold on Walls: How to Remove It (and When to Replace the Wall)
Mold Killer Spray: Which Type Works on Which Surface
How to Remove Mold with Spray: The Complete 7-Step Process
Mold-Resistant Paint: How It Works, When to Use It, and What It Can't Do
How to Remove Mold from Your Shower (Step-by-Step)
How to Get Rid of Black Mold: DIY Removal Guide
Need Professional Mold Removal?
Get free, no-obligation quotes from licensed mold remediation specialists in your area.
Get Free Quotes