Mold Under Sink: How to Remove It and Stop Leaks for Good
Out of the Mold Editorial Team
Our guides are research-backed and cite EPA, CDC, and peer-reviewed sources. Product reviews are based on hands-on testing, not manufacturer claims. Read our editorial standards.
Affiliate Disclosure: Out of the Mold is reader-supported. As an Amazon Associate, we may earn a commission when you buy through links on this page — at no extra cost to you. Our picks are based on real testing and independent standards, not commissions.
Key Takeaways
- Fix the leak first — cleaning before you stop the water just resets the clock.
- Solid wood and sealed plywood clean up; swollen particle-board bottoms get replaced with exterior-grade plywood.
- Use the paper-towel test on each connection (supply lines, disposal gasket, slip-nuts, faucet base) to find a slow leak.
- A cheap water alarm on the cabinet floor is the best prevention buy — it catches the next drip the day it starts.
- If you rent, a leak under the sink is almost always the landlord's repair; report it in writing with photos.
Mold under a sink almost always traces back to a slow leak or condensation on the pipes. To fix it for good: empty the cabinet, find and stop the water source first, then clean solid wood or sealed plywood with white vinegar or Concrobium. The one part you usually can't save is a particle-board cabinet bottom — once it swells, it can't be decontaminated and has to be cut out and replaced. Kill the leak, dry the cabinet, and drop in a cheap water alarm, and it won't come back.
Open the cabinet under a kitchen or bathroom sink and you're looking at a mold incubator: it's dark, enclosed, has zero airflow, and sits directly under the one set of pipes in your house most likely to weep. Most people find the mold by smell or by moving a bottle of dish soap and seeing black speckling on the cabinet floor. The good news is that this is one of the more fixable mold problems — as long as you deal with the water and know which parts of the cabinet are worth saving.
Why mold under the sink is so common
There's usually a specific water source, and it's often not the dramatic leak you'd expect:
- P-trap and pipe condensation.Cold water lines and the drain trap sweat when the cabinet air is warm and humid. It's a slow, steady drip nobody sees — and the moisture source most people never think of.
- Slow connection leaks. Supply-line fittings, the drain slip-nuts, the garbage-disposal gasket, and the faucet base all loosen over time and seep a few drops at a time.
- Disposal splash and dishwasher backupsadd food particles and grease — extra mold food a bathroom sink doesn't have.
- No airflow. A closed cabinet packed with cleaning supplies traps every bit of that moisture against porous cabinet material.
Kitchen vs. bathroom: slightly different risks
Kitchen under-sink cabinets get the disposal splash, grease, and food residue that feed mold faster, and their bases are more often cheap particle board. Bathroom cabinets run more humid overall and get checked less often, so a slow leak can run for months. Either way the drain and supply connections are the usual culprits, and either way the fix is the same.
Is black mold under the sink dangerous?
Most under-sink mold is Aspergillus or Penicillium, not the toxic-black Stachybotrys everyone fears — Stachybotrysneeds chronic saturation, which a slow drip rarely provides. And because the cabinet is enclosed, the spores don't circulate into your living space the way mold on an open wall does. That said, opening the door releases whatever's built up, so ventilate the room and wear an N95 before you start working. For what the health agencies actually say about exposure, the CDC's mold page and EPA cleanup guidance are the sources to trust — not a remediation company's sales page.
Test the area (or call a pro) if the mold has spread to the drywall behind the cabinet, covers more than about 10 square feet, or someone in the home has asthma or allergies flaring up. A home mold test kittells you whether it's contained or spreading; if you want to know exactly what you're dealing with before a big cabinet job, our ERMI test guide covers the lab option.
3M 8511 N95 Particulate Respirator
3M
$20–30
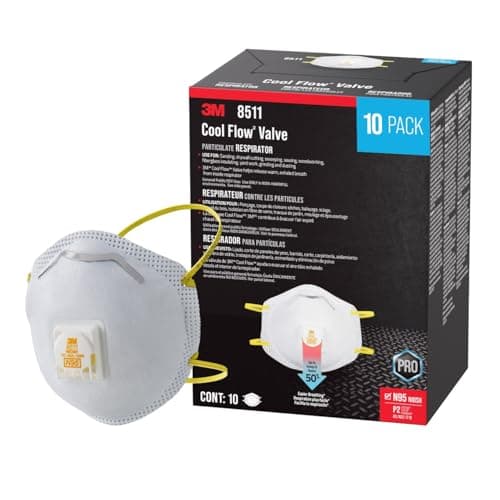
A NIOSH-approved N95 particulate respirator with Cool Flow exhalation valve for comfortable breathing during mold remediation. Filters at least 95% of airborne particles including mold spores. The adjustable M-noseclip and dual-strap design provide a secure seal. OSHA-recommended for mold work.
Pros
- NIOSH-approved N95 filtration
- Cool Flow valve reduces heat buildup
- Adjustable nose clip for secure fit
Cons
- Disposable, not reusable long-term
- Does not protect against chemical fumes or VOCs
- May not fit all face shapes comfortably
Can you save the cabinet? A decision framework
This is the question everyone actually has, and the answer comes down to one material: particle board. Solid wood and sealed plywood can be cleaned. Particle board (the compressed sawdust-and-glue board most budget cabinet bottoms are made of) drinks water, swells, and crumbles — and once it's swollen, no amount of spray brings it back. The EPA's rule for porous materials applies: if it's soaked and moldy, it comes out.
| Condition | Save | Replace |
|---|---|---|
| Surface mold on solid wood | ✅ | — |
| Surface mold on sealed plywood | ✅ | — |
| Mold on particle-board bottom | — | ✅ |
| Particle board swollen or soft | — | ✅ |
| Mold on cabinet side walls | Maybe | If penetrated |
| Mold on drywall behind cabinet | — | Assess separately |
Replacing just the cabinet floor is a genuine DIY job — Family Handyman's walkthrough uses a piece of 1/2-inch exterior-grade plywood cut to fit over the old base, sealed and varnished so the next leak doesn't ruin it. Exterior-grade plywood is the upgrade that matters: it shrugs off the occasional drip that destroyed the particle board. Reserve full-cabinet replacement for when the vertical sides are soft too.
Step-by-step: removing mold under the sink
- Empty the cabinet and gear up. Everything out, then N95 and gloves on. Open a window or run a fan.
- Find and fix the leak first.This is non-negotiable — clean before you fix the water and you'll be back here in a month. (Leak-hunting walkthrough below.)
- Clean solid wood and sealed plywood. Mist with white vinegar, wait 10–15 minutes, scrub, wipe. Then apply Concrobium, which dries to an antimicrobial film that slows regrowth without bleach fumes in an enclosed cabinet. For the how and why of vinegar here, see does vinegar kill mold.
- Cut out and replace swollen particle board. No decontaminating it — remove and replace with sealed exterior-grade plywood.
- Check behind and under the cabinet.Look at the drywall behind it; if that's moldy, treat it as mold on drywall(clean if surface, replace if the paper's gone).
- Dry it completely, then seal.Fan it dry, then coat the surfaces with Concrobium or a sealer so any trace mold can't restart.
Concrobium Mold Control
Concrobium
$10–15
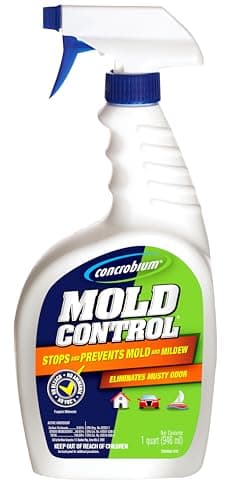
A patented, EPA-registered mold control solution that kills mold without bleach, ammonia, or VOCs. The tri-salt polymer formula crushes mold spores as it dries and leaves an invisible antimicrobial barrier to prevent regrowth. Safe for indoor use on virtually any surface.
Pros
- Non-toxic, no bleach or ammonia
- Kills mold and prevents regrowth
- Safe for use around children and pets
Cons
- Does not remove existing mold stains
- Takes longer to work than bleach-based products
- May require multiple applications for severe infestations
How to find the leak (connection by connection)
The fastest way to pin down a slow leak is the paper-towel test: wrap a dry paper towel around each connection, then check them after an hour of normal use. The wet one is your culprit. Work through them in this order, from most to least common:
- Supply-line fittings. The braided hoses feeding the faucet. Hand-tighten first; if they still weep, replace them (braided stainless lines are cheap and should be swapped every 5–10 years anyway).
- Garbage-disposal gasket. The rubber gasket where the sink meets the disposal fails often and is a few-dollar part.
- Drain slip-nuts.The plastic nuts on the P-trap; snug them by hand or add fresh plumber's putty.
- Faucet base. Water pooling on top of the sink deck can run down through a worn faucet seal — reseal with silicone.
- Dishwasher hose connection. Where the drain hose ties into the disposal.
- Bare condensation.If every connection is dry but the pipes are wet, it's trap sweat — insulate the cold line with foam pipe wrap and improve cabinet airflow.
If the paper-towel test comes up dry but the cabinet floor stays damp, the moisture is coming from behind or below. A pinless moisture meter reads through the cabinet base and back wall without drilling, so you can find the wet zone before you start tearing things out.
Klein Tools ET140 Pinless Moisture Meter
Klein Tools
$45–60
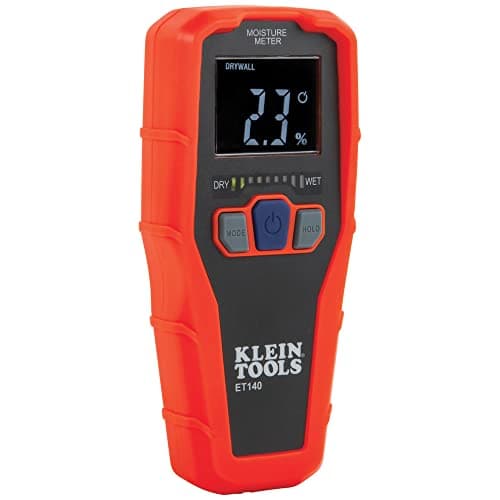
A professional-grade pinless moisture meter that detects hidden moisture in drywall, wood, and masonry without leaving holes. Uses electromagnetic sensor technology to measure moisture content up to 3/4 inch below the surface. Essential for identifying moisture problems before mold develops.
Pros
- Non-invasive pinless technology, no holes in walls
- Detects moisture up to 3/4 inch deep
- Visual and audible moisture alerts
Cons
- Less precise than pin-type meters on exact moisture percentage
- Battery not included
- Can give false readings on metallic or foil-backed surfaces
Prevention: never deal with this again
- Drop in a water alarm. A battery leak detector that sits on the cabinet floor and shrieks the moment it gets wet is the single best prevention buy here — it turns a months-long hidden leak into a same-day fix. Cheap, and it pays for itself the first time it catches a drip.
- Do a monthly 30-second check. Open the door, look and feel for moisture around the connections.
- Insulate sweating pipes with foam wrap to kill condensation.
- Keep stored items off the cabinet floor on a small rack or riser so air can move and a drip is visible.
- Swap braided supply lines every 5–10 years before they fail.
- Add airflow. Prop the door open occasionally, or run a small desiccant absorber in a chronically humid bathroom cabinet.
If you rent
A leak under the sink is almost always the landlord's responsibility, not yours — it's a plumbing and habitability issue. Report it in writing (text or email, so there's a record) with photos as soon as you find it, and keep a copy. You can clean surface mold off a solid cabinet yourself, but a swollen particle-board base, a failed pipe, or mold in the wall behind the cabinet is a repair to request, not to pay for.
What it costs
DIY, this is one of the cheapest mold jobs there is: a bottle of vinegar or Concrobium ($10–$15), a half-sheet of exterior-grade plywood for the base, and a water alarm come to well under $50. If the mold has spread into the wall behind the cabinet or the whole cabinet is compromised, professional kitchen mold remediation generally falls in the $500–$4,000 range depending on how far it's spread. Size your specific job with our mold removal cost calculator.
Frequently Asked Questions
Is mold under the sink dangerous?
Should I replace cabinets with mold under the sink?
What causes mold under the kitchen sink?
Can mold under the sink spread to other areas?
How much does it cost to fix mold under a sink?
Related Articles
Mold on Drywall: Should You Clean It or Replace It?
Concrobium Mold Control Review: What It Does (and What It Won't)
Does Vinegar Kill Mold? The Science, the Limits, and How to Use It Right
How to Test for Mold at Home: DIY Methods That Actually Work
Musty Smell in House? Here's How to Find & Fix the Source
How to Get Rid of Black Mold: DIY Removal Guide
Need Professional Mold Removal?
Get free, no-obligation quotes from licensed mold remediation specialists in your area.
Get Free Quotes