Crawl Space Encapsulation: The Complete Cost & DIY Guide (2026)
Out of the Mold Editorial Team
Our guides are research-backed and cite EPA, CDC, and peer-reviewed sources. Product reviews are based on hands-on testing, not manufacturer claims. Read our editorial standards.
Affiliate Disclosure: Out of the Mold is reader-supported. As an Amazon Associate, we may earn a commission when you buy through links on this page — at no extra cost to you. Our picks are based on real testing and independent standards, not commissions.
Key Takeaways
- Encapsulation runs $3–$10/sq ft installed — most homes $3,500–$8,500, ~$5,500 average (Restorable Solutions & HomeGuide, 2026). DIY materials for a dry space: ~$700–$1,200.
- It's an indoor-air-quality decision: up to 40–50% of your living-space air rises from the crawl space through the stack effect.
- Five components make it work — sealed barrier, sealed vents, dehumidifier, insulation, and drainage ONLY if the space floods. The dehumidifier is non-negotiable.
- Treat existing mold first. Sealing plastic over active growth builds a greenhouse and you pay twice.
- Reading a quote: be skeptical of drainage on a dry crawl space and a 20-mil liner upsell — 12 mil is what pros actually lay.
Crawl space encapsulation runs $3–$10 per square foot installed — most homeowners pay $3,500–$8,500, averaging around $5,500 (Restorable Solutions & HomeGuide, 2026). A DIY job on a dry, accessible crawl space costs roughly $700–$1,200 in materials: a reinforced liner, seam tape, and a crawl-space dehumidifier. The decision isn't really about your foundation, though — it's about the air you breathe. Building-science research (the Advanced Energy 100-home crawlspace study) finds that 40–50% of first-floor air rises from the crawl space through the floor (the "stack effect"), so a moldy, humid crawl space is an indoor-air-quality problem wearing a foundation costume.
Every quote you get for this job comes from someone with a reason to shape the number. A contractor wants to sell you labor and hides the parts list; a liner supplier wants to sell you plastic and buries when you genuinely need a $9,000 system versus a weekend of your own work. This guide is the one that has no liner to sell you — just the real component costs, the honest DIY line, and how to read a pro's quote so you don't overpay for drainage you don't need. We already cover the pieces in depth: how to pick liner thickness, how to size the dehumidifier, and how to treat existing crawl-space mold first. This page ties them together.
What Crawl Space Encapsulation Actually Is
Encapsulation means sealing the crawl space off from the ground and the outside air so it stops feeding moisture into your house. It is a specific set of five components, and skipping any one of them is why some "encapsulated" crawl spaces still grow mold:
- A sealed vapor barrier across the floor and up the foundation walls — not just a floor sheet, but a continuous, taped envelope. This is the core difference from a bare code-minimum ground cover.
- Sealed foundation vents.Vented crawl spaces are a building-science mistake we're still undoing; in humid months those vents let warm, wet air in to condense on cool surfaces. Encapsulation closes them.
- A dehumidifier. This is not optional. A sealed space with no active drying just traps humidity. See our crawl-space dehumidifier guide for sizing by square footage.
- Insulation on the foundation walls (or rim joists) once the space is conditioned rather than vented.
- Drainage, only if needed— a sump or interior drain for crawl spaces that take on standing water. Most dry crawl spaces don't need this, and it's the line item contractors most often add unnecessarily.
A bare vapor barrier — a 6-mil sheet laid loose over the dirt — is notencapsulation. It cuts ground moisture and meets code (IRC R408.3), but it leaves the vents open and adds no active drying. It's a fine budget step; it just isn't the sealed, conditioned system that ends the moisture cycle for good.
Signs You Actually Need It
Encapsulation is a real investment, so match it to real symptoms rather than a salesperson's urgency. You're a genuine candidate if you have:
- Standing water or chronically damp soil under the house after rain.
- Visible mold on the joists or subfloor — treat it first (crawl-space mold guide); never seal plastic over active growth.
- A musty smell in the rooms abovethat you can't trace (why your house smells musty) — that's the stack effect delivering crawl-space air upstairs.
- Sagging or springy floors, cupped hardwood, or sticking doors — signs of moisture in the framing.
- High summer energy bills and humid indoor air your AC fights all season.
- Pests — a damp crawl space is an invitation.
No standing water, no mold, a hygrometer reading under 60% relative humidity? A sealed vapor barrier alone may be all you need. Confirm the humidity with a cheap meter before you spend five figures.
Crawl Space Encapsulation Cost (2026, Sourced)
Professional crawl space encapsulation runs $3 to $10 per square foot, with most homeowners spending $3,500 to $8,500 and a national average around $5,500. The spread is almost entirely square footage and which components you add — a bare barrier is cheap; a full system with a dehumidifier and drainage is where the money goes.
| Scope | Typical 2026 cost |
|---|---|
| Vapor barrier installed (alone) | $1,200 – $4,500 |
| Dehumidifier, installed | $800 – $2,500 |
| Full encapsulation, up to 1,000 sq ft | $2,500 – $8,000 |
| Full encapsulation, 1,000–1,500 sq ft | $6,000 – $12,000 |
| Full encapsulation, 1,500–2,000 sq ft | $8,000 – $15,000 |
| DIY materials (dry, accessible space) | ~$700 – $1,200 |
Cost sources: Restorable Solutions and HomeGuide, 2026 encapsulation pricing (retrieved 2026-09-16). DIY figure is the sum of the component price ranges below.
Two things drive the number that no calculator captures. First, condition: a crawl space that needs mold remediationor a drainage fix first adds that cost on top. Second, the ROI is split — encapsulation often trims humidity-driven cooling costs and is a documented resale positive, but those returns come slowly, so don't let a contractor sell it purely as an "it pays for itself" project.
The DIY Component Cart
If your crawl space is dry, accessible, and mold-free (or already treated), encapsulation is a legitimate — if miserable — DIY weekend. Here's what actually goes in the cart, priced as separate line items the suppliers don't like to show you. This is where the $5,500 average becomes ~$1,000.
The liner (the biggest decision)
Thickness is the call that separates a barrier that lasts decades from one you re-do in three years. Building scientists use reinforced 10–12 mil for a real encapsulation; the string-reinforced grid is what stops a puncture from tearing across the whole sheet. A plain 6-mil polymeets the code minimum and is honest budget coverage for a small or low-traffic space, but it wears through under knees and gravel. Don't pay for 20 mil — that's overkill for a floor. The full breakdown is in our vapor barrier thickness guide.
The Liner Guys 12 Mil Reinforced Crawl Space Vapor Barrier
The Liner Guys
$180–360
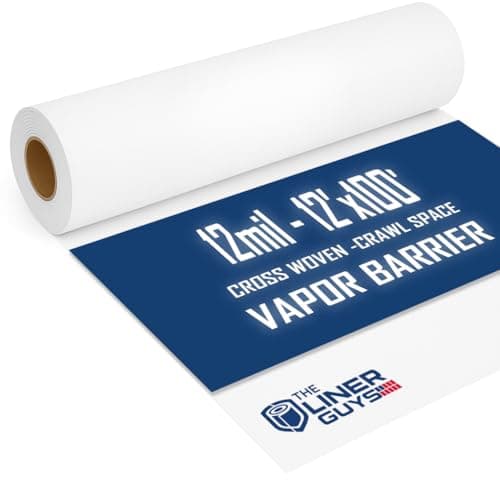
A string-reinforced 12 mil polyethylene liner — the thickness building scientists actually recommend for crawl spaces with foot traffic, stored gear, or a gravel subgrade. The reinforcement grid is what separates a barrier that lasts decades from a 6 mil sheet that tears the first time you crawl across it. This is the material for a permanent fix, not a code-checkbox.
Pros
- String-reinforced 12 mil — the DIY durability sweet spot, resists punctures from rocks and pipes
- Rated for decades of service, not the few years a 6 mil liner survives
- Low enough permeance for a proper sealed encapsulation, not just code compliance
Cons
- Overkill (and pricier) if you only need code-minimum floor cover
- Heavy rolls are awkward to maneuver in a tight crawl space
- You still need seam tape and a way to fasten it to the walls
Frost King 6 Mil Black Polyethylene Sheeting
Frost King
$20–55
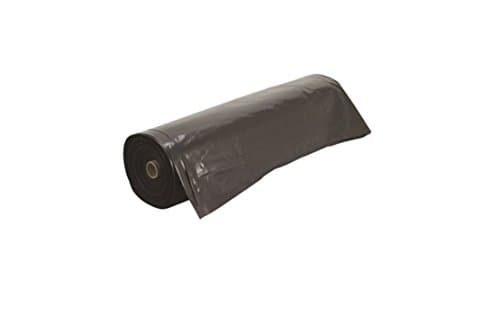
Standard 6 mil black polyethylene — the code-minimum material under IRC R408.3. It's honest budget coverage for a small or low-traffic crawl space, but understand what you're buying: 6 mil punctures and wears through faster than the reinforced 10–12 mil pros use for a lasting encapsulation. Fine for a patch; underbuilt for a whole space you never want to revisit.
Pros
- Meets the IRC R408.3 6 mil code minimum for crawl space ground cover
- Cheapest way to cover a small dirt patch or damp section
- Black poly blocks light so it won't feed anything under it
Cons
- 6 mil tears easily during install and wears through under gravel or knees
- Won't achieve the low permeance a sealed encapsulation needs
- Short rolls mean lots of taped seams on a bigger space
Seam tape (the step people skip)
An untaped seam is just two sheets of plastic lying next to each other — ground moisture finds the gap and the barrier that "looks installed" leaks. Overlap seams six inches and tape every one with a purpose-built vapor-barrier seam tape.
Vapor Barrier Seam Tape (9 Mil, 4" × 180')
Generic
$18–45
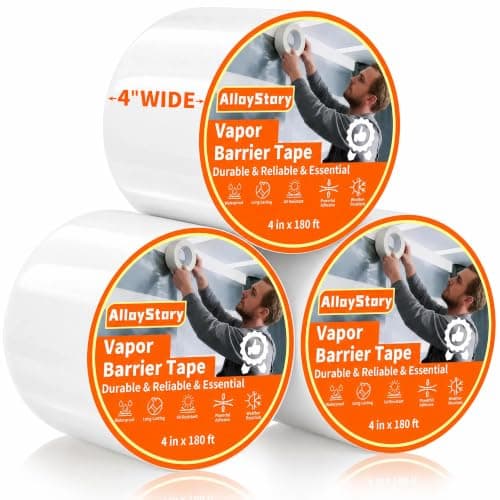
The tape that turns overlapping sheets into a continuous barrier. An untaped seam is just two pieces of plastic lying next to each other — ground moisture finds the gap. A 9 mil, 4-inch tape across a 6-inch overlap is the detail that separates a barrier that works from one that just looks installed.
Pros
- Purpose-built to seal barrier overlaps so ground moisture can't wick through gaps
- Wide 4" face covers a proper 6" seam overlap
- Multi-roll packs cover a whole crawl space in one order
Cons
- Won't stick to dusty or damp poly — surfaces must be wiped first
- Not a substitute for mechanical fasteners on wall attachment
- Cheap tapes lose grip over years; buy the heavier mil
The dehumidifier (non-negotiable)
This is the difference between encapsulation and just wrapping your dirt in plastic. A sealed crawl space needs active drying to hold relative humidity below 60%, and a consumer portable will freeze up and die in a cold crawl space. A purpose-built unit with auto-defrost is the standard choice — size it to your square footage using our crawl-space dehumidifier guide.
AlorAir Sentinel HD55S Crawl Space Dehumidifier
AlorAir
$450–550
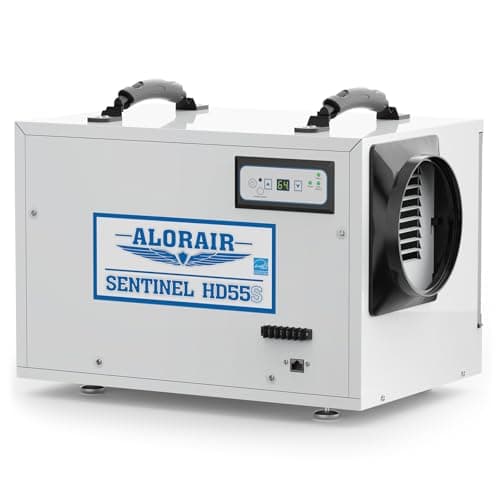
A commercial-grade crawl space dehumidifier engineered for the low temperatures and horizontal clearances portable units can't handle. Hot-gas auto defrost keeps it running down to 36°F, and its epoxy-coated coils resist the corrosion that kills consumer units in damp crawl spaces. The standard choice for crawl space moisture control after encapsulation.
Pros
- Purpose-built for crawl spaces — operates down to 36°F with auto defrost
- 120 pints per day saturation capacity, Energy Star certified
- 5-year warranty and ductable design for sealed installs
Cons
- Significant investment compared to portable units
- Gravity drain only on this model — pump version costs more
- Requires proper crawl space placement and clearance
Don't skip the PPE
You'll be dragging plastic through a tight, dusty, spore-laden space for hours. A P100 respirator (not a paper mask) and chemical-resistant gloves are the minimum; full tiers are in our protective gear for mold removal guide.
3M 6391 Half Facepiece Reusable Respirator with P100 Filters
3M
$30–40
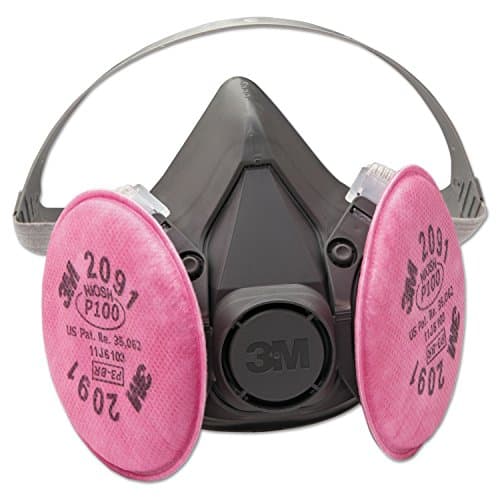
The step up from an N95 for serious mold work. The reusable half-facepiece takes P100 filters (99.97% particulate) and can pair with organic-vapor cartridges, so it handles both spores and the fumes from bleach, RMR-86, or paint strippers. This is what remediation pros wear for anything longer than a quick wipe-down.
Pros
- P100 filters block 99.97% of particles plus the bleach and ammonia fumes an N95 can't
- Reusable silicone facepiece seals better than a disposable mask
- Swappable cartridges — buy organic-vapor filters for chemical work
Cons
- Costs more upfront than a box of N95s
- Needs a clean-shaven face for a real seal, like any tight-fitting respirator
- Cartridges are a recurring cost once they clog
SHOWA 732 15-Mil Chemical-Resistant Nitrile Gloves (12-Pack)
SHOWA
$18–28
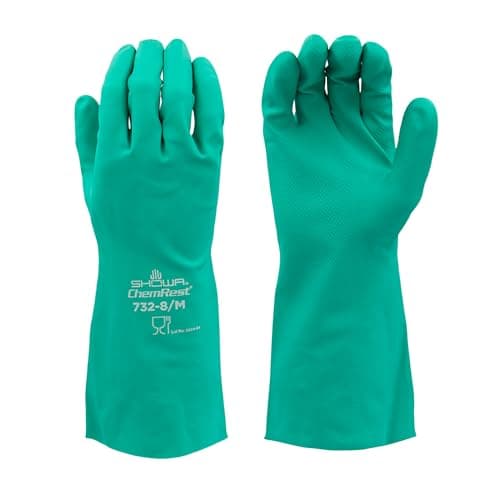
The disposable nitrile gloves from a box of 100 are fine for a quick spray, but they thin out and tear against bleach-based products and hours of scrubbing. SHOWA's 15-mil chemical-resistant nitrile with an extended cuff is what holds up to RMR-86, Concrobium, and repeated mold jobs — a real barrier, not a splash guard.
Pros
- 15-mil nitrile shrugs off bleach, RMR-86, and Concrobium without dissolving
- Extended cuff protects the forearm when reaching into cavities
- Reusable — flock lining makes them comfortable for repeat jobs
Cons
- Thicker than exam gloves, so less finger dexterity
- Reusable gloves need rinsing and drying between uses
- Sized for hands — measure before ordering
When to Hire a Pro (Honest Triggers)
Some of this is genuinely a professional job, and no article should talk you into crawling under a house that needs one. Call a contractor when there's:
- Existing mold past ~10 sq ft, ductwork contamination, or structural rot — remediate first, and that's its own scoped job.
- Standing water or a grading/drainage problem— you have to fix why water arrives before you seal, or you're sealing a swamp.
- No safe access— a belly-crawl clearance under 24 inches, or exposed wiring you can't work around.
How to read the quote so you don't overpay:a fair encapsulation quote itemizes the liner (with its mil rating), vent sealing, the dehumidifier (with capacity), and insulation. Be skeptical of two things: a drainage system on a crawl space that doesn't flood, and a 20-mil liner upsell (12 mil is what most pros actually lay). If a $9,000 quote is mostly drainage and premium liner on a dry space, get a second quote — that's where padding hides. For the full remediation-vs-encapsulation cost picture, see our mold removal cost breakdown.
Encapsulation and Mold: Getting the Order Right
The single most expensive mistake here is sealing plastic over active mold. You create a greenhouse: the moisture in the wood has nowhere to go, and you pay twice — once for the encapsulation, again to tear it out and remediate. The correct order is always treat the mold, dry the space, then encapsulate. Walk the crawl-space mold protocol first if you have visible growth. Once the space is sealed and a dehumidifier holds it under 60% RH, mold has nothing to grow on — that combination, not the plastic alone, is what makes encapsulation the permanent fix. If your problem is broader indoor humidity, our dehumidifier for mold guide covers the whole-home side, and a basement often needs the same moisture-first logic.
The Bottom Line
Encapsulation is worth it when you have a genuine moisture source and you value the air quality and comfort upstairs, not because a salesperson said your foundation was in danger. Price the pro job honestly ($3,500–$8,500 for most homes), price the DIY route honestly (~$1,000 in materials for a dry, accessible space), and match the choice to your actual conditions. Whichever way you go, the dehumidifier is the part that isn't optional — sealing without drying is the mistake that sends people back under the house.
Frequently Asked Questions
How much does crawl space encapsulation cost in 2026?
Is crawl space encapsulation worth it?
Can I encapsulate my crawl space myself?
What's the difference between a vapor barrier and encapsulation?
Do I need a dehumidifier after encapsulating?
Does crawl space encapsulation stop mold?
Related Articles
Best Crawl Space Dehumidifiers That Actually Work (2026)
Crawl Space Vapor Barrier: Mil Thickness & DIY Install (2026)
Mold in Your Crawl Space: DIY Removal vs Calling a Pro
Best Dehumidifiers for Mold Prevention & Removal (2026)
How to Get Rid of Mold in Your Basement (2026 Guide)
How to Test for Mold at Home: DIY Methods That Actually Work
Need Professional Mold Removal?
Get free, no-obligation quotes from licensed mold remediation specialists in your area.
Get Free Quotes