Mold in Your Crawl Space: DIY Removal vs Calling a Pro
Out of the Mold Editorial Team
Our guides are research-backed and cite EPA, CDC, and peer-reviewed sources. Product reviews are based on hands-on testing, not manufacturer claims. Read our editorial standards.
Affiliate Disclosure: Out of the Mold is reader-supported. As an Amazon Associate, we may earn a commission when you buy through links on this page — at no extra cost to you. Our picks are based on independent standards, manufacturer specifications, and published research, not commissions.
Key Takeaways
- The DIY line: under ~10 sq ft of surface mold on firm wood, no HVAC in the space, no standing water, no health risk.
- DIY costs $150–$400; professional crawl-space remediation runs $1,500–$4,000 (2026), with a 20–35% confined-space premium.
- Crawl-space air rises into your living space (stack effect) — ductwork contamination is an automatic call-a-pro.
- Kill and fog the mold, but the job isn’t done until the moisture is fixed: vapor barrier, then a dehumidifier.
- Removal without moisture control means paying twice — keep RH below 60% and it stays gone.
Surface mold on crawl-space joists covering less than about 10 square feet, with no soft or crumbling wood and no HVAC in the space, is a DIY job — plan on $150–$400 in gear. Beyond that footprint, or with structural rot, ductwork contamination, or standing water, it's a professional remediation, which runs $1,500–$4,000for an average crawl space (Angi & HomeGuide, 2026). Either way, the mold comes back unless you fix the moisture — vapor barrier, then a dehumidifier. That last step is the one contractors and homeowners both skip, and it's why people pay twice.
A crawl-space mold problem almost always arrives the same way: an inspector's report during a home sale, or you finally crawl under the house chasing a musty smell in the houseand find the joists furred with white or black growth. Then come the quotes — $2,000, $5,000, sometimes more — and the pressure to sign today. Here's the independent triage a remediation salesperson won't give you: when you can genuinely do this yourself, when you truly need a pro, what the pro should actually be doing for the money, and how to make sure you only pay for it once.
The DIY-vs-Pro Line (Read This First)
The single most useful number here comes from the EPA: "If the moldy area is less than about 10 square feet... in most cases, you can handle the job yourself." That's a roughly 3 ft × 3 ft patch. Use it as your dividing line, then layer on the crawl-space-specific disqualifiers:
- DIY-able: under ~10 sq ft of surface growth on framing you can reach; wood is firm when you press it; no ductwork or HVAC air handler in the crawl space; no sewage or standing water; nobody in the home with asthma, a mold allergy, or immune suppression.
- Call a pro:growth well past 10 sq ft or across most of the joists; wood that's soft, spongy, or crumbling (that's rot, a structural question, not just a cleaning one); mold on or around crawl-space ductwork (it will spread to the living space through the system); flooding or a sewage backup; or a household health factor.
Why the HVAC rule is non-negotiable: a crawl space isn't sealed off from your living area. Warm air rises and pulls crawl-space air up through the floor — the "stack effect" — so spores and the musty gases they give off end up in the rooms above. Ductwork in a moldy crawl space actively distributes them. That's a containment job, not a weekend-with-a-spray-bottle job.
Why Crawl Spaces Grow Mold in the First Place
Diagnose before you treat, or you'll be back down there next spring. Vented crawl spaces are a building-science mistake we're still living with: in humid months, warm outdoor air enters the vents, hits the cool earth and cool framing, and condenses. Bare soil wicks ground moisture straight into the air. Add a plumbing drip, a grading problem that sends rain toward the foundation, or a dryer vent dumping into the space, and you have a mold incubator. The mold is a symptom; humidity above about 60% is the disease.Confirm it with a cheap hygrometer before and after — if you don't drive the relative humidity down, nothing you spray will hold.
Identify What You're Looking At
White, fuzzy or cottonygrowth on joists is usually surface mold (often the genera you'll also see called white mold) and is typically the most DIY-friendly. Black or greenish stainingthat's flat and set into the grain is more established. Neither color tells you the species or the health risk on its own — testing does. If you're buying the house, or you want to document the before/after, a DIY mold test kit or a lab-analyzed ERMI test gives you a defensible baseline. You do not need a test to justify cleaning obvious surface growth — you need it to prove what species you have or to confirm the job worked.
The DIY Protocol
If you cleared the triage above, here's the sequence. Budget a full day and don't rush the drying.
1. Gear up — a crawl space is the worst place to skip PPE
You'll be face-to-joist with spores in a tight, poorly ventilated space. A P100 respirator (not a paper dust mask), non-vented goggles, chemical-resistant gloves, and a disposable coverall are the minimum. Full rationale and tiers are in our protective gear for mold removal guide.
3M 6391 Half Facepiece Reusable Respirator with P100 Filters
3M
$30–40
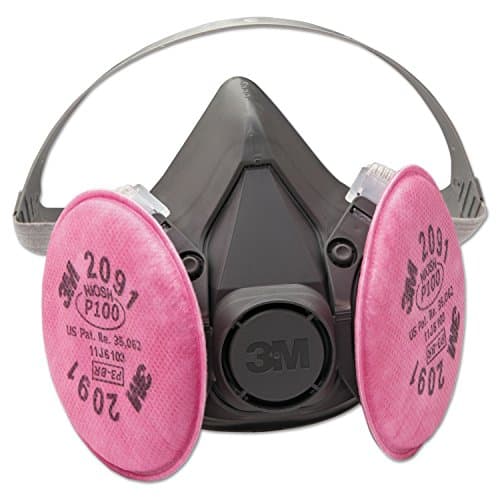
The step up from an N95 for serious mold work. The reusable half-facepiece takes P100 filters (99.97% particulate) and can pair with organic-vapor cartridges, so it handles both spores and the fumes from bleach, RMR-86, or paint strippers. This is what remediation pros wear for anything longer than a quick wipe-down.
Pros
- P100 filters block 99.97% of particles plus the bleach and ammonia fumes an N95 can't
- Reusable silicone facepiece seals better than a disposable mask
- Swappable cartridges — buy organic-vapor filters for chemical work
Cons
- Costs more upfront than a box of N95s
- Needs a clean-shaven face for a real seal, like any tight-fitting respirator
- Cartridges are a recurring cost once they clog
Sellstrom Non-Vented Anti-Fog Chemical Splash Goggles
Sellstrom
$5–12
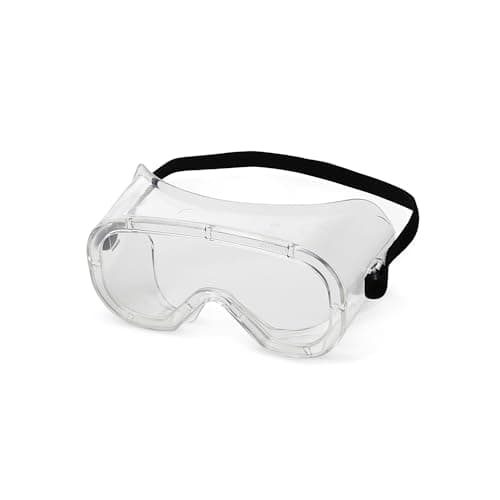
Cheap insurance for your eyes. Non-vented is the detail that matters: vented safety glasses let spores and chemical mist reach your eyes from below, which is exactly the angle you're exposed to when scrubbing a ceiling or spraying joists overhead. The anti-fog coating is what makes them usable in a damp crawl space.
Pros
- Non-vented design blocks splashes and fine spores that slip past vented safety glasses
- Anti-fog coating survives humid basements and crawl spaces
- Fits over most prescription glasses
Cons
- Non-vented lenses fog faster than vented ones without the coating
- Basic strap, not the most comfortable for all-day wear
- Clear lens scratches if tossed in a toolbox loose
SHOWA 732 15-Mil Chemical-Resistant Nitrile Gloves (12-Pack)
SHOWA
$18–28
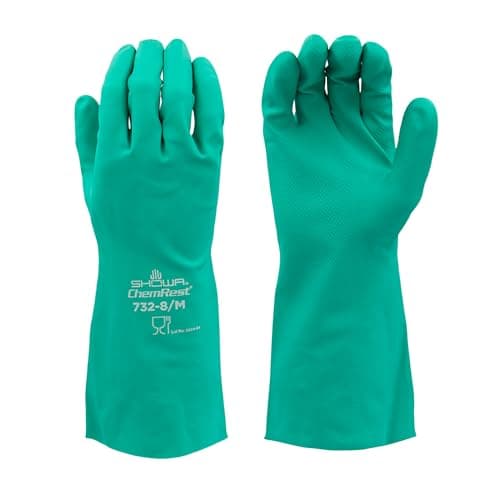
The disposable nitrile gloves from a box of 100 are fine for a quick spray, but they thin out and tear against bleach-based products and hours of scrubbing. SHOWA's 15-mil chemical-resistant nitrile with an extended cuff is what holds up to RMR-86, Concrobium, and repeated mold jobs — a real barrier, not a splash guard.
Pros
- 15-mil nitrile shrugs off bleach, RMR-86, and Concrobium without dissolving
- Extended cuff protects the forearm when reaching into cavities
- Reusable — flock lining makes them comfortable for repeat jobs
Cons
- Thicker than exam gloves, so less finger dexterity
- Reusable gloves need rinsing and drying between uses
- Sized for hands — measure before ordering
2. Clean and treat the wood
The EPA's method for hard surfaces is deliberately simple: scrub with detergent and water and dry completely. For crawl-space framing, most people follow that with an EPA-registered fungicide that also inhibits regrowth — Concrobium Mold Control is the usual pick because it's bleach-free (better on porous wood, which bleach can drive moisture into) and leaves an antimicrobial film. HEPA-vacuum the debris; don't just dry-brush spores into the air.
Concrobium Mold Control (32 oz Spray, 2-Pack)
Concrobium
$34–40 (2 bottles)
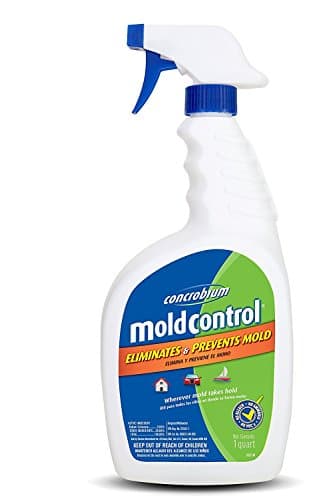
A patented, EPA-registered mold control solution that kills mold without bleach, ammonia, or VOCs. The tri-salt polymer formula crushes mold spores as it dries and leaves an invisible antimicrobial barrier to prevent regrowth. Safe for indoor use on virtually any surface.
Pros
- Non-toxic, no bleach or ammonia
- Kills mold and prevents regrowth
- Safe for use around children and pets
Cons
- Does not remove existing mold stains
- Takes longer to work than bleach-based products
- May require multiple applications for severe infestations
3. Fog the space to reach what you can't wipe
Crawl spaces are full of surfaces a rag will never touch — the tops of joists, sill plates, the underside of the subfloor. This is the one place fogging genuinely earns its keep, and it's a query Bing sends us a lot of ("foggers to kill mold in crawl spaces"). You have two honest options: a ULV cold fogger loaded with Concrobium for controllable coverage (walk-through in our Concrobium fogger guide), or a one-shot mold bomb for a smaller sealed space (see our mold bomb fogger review). Fogging treats surfaces — it does nothing about the moisture, so it's step three, not step one.
Concrobium Mold Control Fogger
Concrobium
$40–100
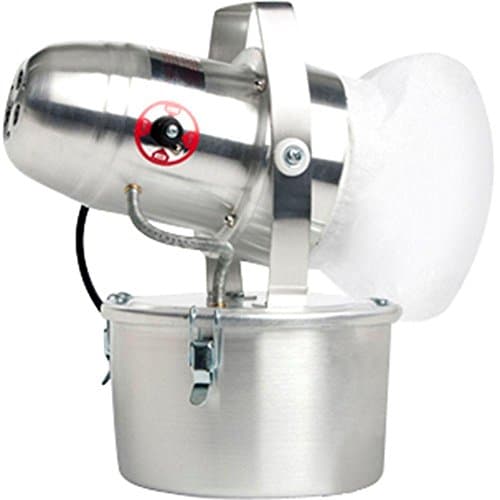
A complete fogging system that disperses Concrobium Mold Control as a fine mist to treat entire rooms. The cold-fog technology reaches into cracks, crevices, and HVAC ducts where mold hides. Kills existing mold and leaves a protective barrier to prevent regrowth.
Pros
- Treats entire rooms including hard-to-reach areas
- Non-toxic Concrobium formula, safe for occupied spaces
- Includes cold fogger machine and mold control solution
Cons
- Fogger machine is loud and requires setup
- Does not remove existing mold stains
- Solution needs time to dry and form protective barrier
BioCide Mold Bomb Fogger
BioCide Labs
$50–65
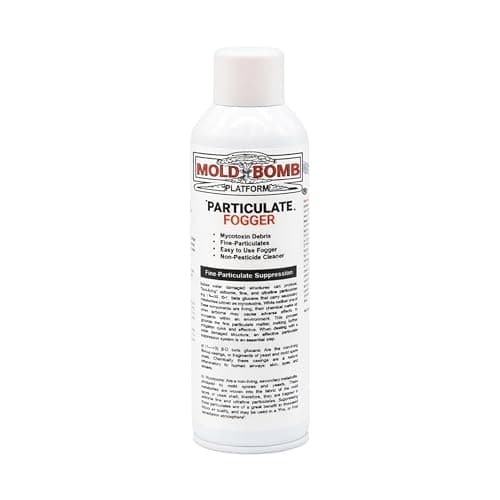
A single-use aerosol fogger that releases an EPA-registered antimicrobial mist to kill mold, mildew, and odor-causing bacteria. Simply place the canister in the center of the room, press the button, and leave the area for 2-4 hours. Treats up to 400 sq ft per can.
Pros
- One-button aerosol fogger, no equipment needed
- Treats up to 400 sq ft per can
- EPA-registered antimicrobial
Cons
- Must vacate area during and after treatment
- Chemical odor lingers for several hours
- Single-use canister is not refillable
What Professional Remediation Actually Costs
If you're past the DIY line, here's what you're paying for and what it should run. Mold pros generally charge $10–$25 per square foot, and a typical crawl-space job lands at $1,500–$4,000(Angi & HomeGuide, 2026 data). Crawl spaces cost more per foot than an open room for a simple reason: technicians work on their knees or their backs in a confined space, which adds a documented 20–35% labor premium. A legitimate scope includes containment and negative air, HEPA filtration, physically removing growth (abrasive blasting on heavy joist contamination), antimicrobial treatment, and — critically — a plan for the moisture. If a quote is all "kill the mold" and nothing about water, get another quote.
| Scope | Typical 2026 cost |
|---|---|
| DIY (PPE + fungicide + fogger) | $150–$400 |
| Professional crawl-space remediation | $1,500–$4,000 |
| Vapor barrier, installed | $2–$4 / sq ft |
| Full encapsulation | $3–$10 / sq ft |
Cost sources: Angi and HomeGuide, 2026 mold-remediation pricing.
The Part Everyone Skips: Fixing the Moisture
Removal without moisture control is a receipt you'll pay twice. The proven sequence, in order:
- Vapor barrier over the soil. Bare dirt is the biggest moisture source in most crawl spaces. A sealed poly barrier cuts it off — our crawl space vapor barrier guide covers mil thickness and overlap.
- A dehumidifier sized for the space. Even with a barrier, humid regions need active drying to hold RH below 60%. See crawl space dehumidifiers for sizing by square footage and sealed-vs-vented.
- Encapsulation for the worst cases. Sealing the whole space (walls included) plus a dehumidifier is the permanent fix in chronically wet crawl spaces — $3–$10 per square foot, but it ends the cycle.
Midea 50-Pint Energy Star Dehumidifier
Midea
$180–220
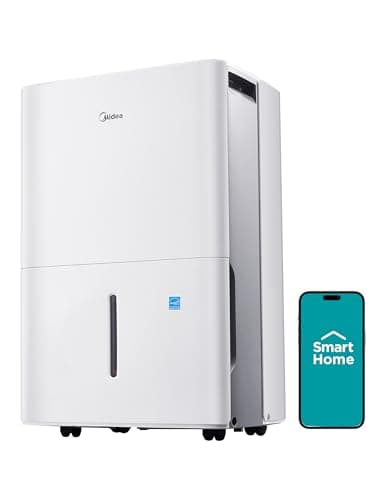
Midea's standard 50-pint unit delivers the same core moisture removal as premium models — auto-humidistat, auto-restart after power outages, and a continuous-drain port — at one of the lowest prices in the 50-pint class. If your basement has a floor drain and you don't need smart features, this is the value pick for holding humidity below 50%.
Pros
- Lowest price per pint of capacity in its class
- Energy Star certified for around-the-clock operation
- Covers up to 4,500 sq ft with continuous-drain option
Cons
- No pump — needs a floor drain or regular bucket emptying
- Basic controls without app connectivity
- Bucket is smaller than the Cube design
Klein Tools ET140 Pinless Moisture Meter
Klein Tools
$45–60
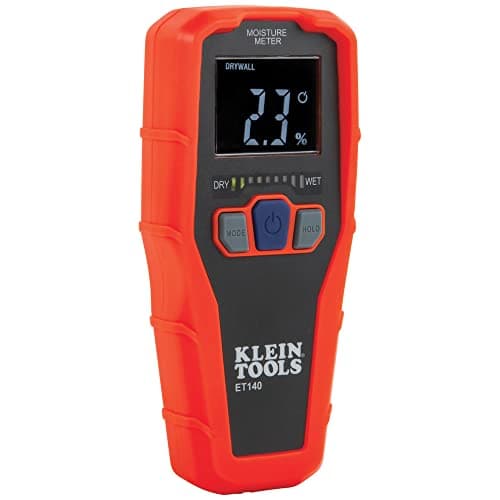
A professional-grade pinless moisture meter that detects hidden moisture in drywall, wood, and masonry without leaving holes. Uses electromagnetic sensor technology to measure moisture content up to 3/4 inch below the surface. Essential for identifying moisture problems before mold develops.
Pros
- Non-invasive pinless technology, no holes in walls
- Detects moisture up to 3/4 inch deep
- Visual and audible moisture alerts
Cons
- Less precise than pin-type meters on exact moisture percentage
- Battery not included
- Can give false readings on metallic or foil-backed surfaces
Re-Inspect and Monitor
Leave a hygrometer in the crawl space and check it monthly for the first season — if RH creeps back above 60%, your moisture fix isn't keeping up. Re-inspect the joists after the first humid stretch. If you tested before, a repeat mold testis the cleanest way to prove the job held. Done right — kill, dry, and keep it dry — crawl-space mold doesn't come back. Skip the drying, and it always does.
Frequently Asked Questions
Is mold in a crawl space dangerous to the living space?
Can I remove crawl space mold myself?
What does crawl space mold removal cost?
Does crawl space mold come back?
Will a fogger kill crawl space mold?
Related Articles
Best Crawl Space Dehumidifiers That Actually Work (2026)
Crawl Space Vapor Barrier: Mil Thickness & DIY Install (2026)
Fogging With Concrobium: Machine Setup, Coverage & Step-by-Step
Mold Bomb Fogger Review: Does It Actually Work? (2026)
Best Protective Gear for Mold Removal: What PPE You Actually Need
Musty Smell in House? Here's How to Find & Fix the Source
Dealing With Mold Right Now?
Our step-by-step mold removal guide walks you through testing your home, choosing the right products, and knowing when a job is too big for DIY.
Read the Removal Guide